Software Development
Installing and Configuring an ODBC Driver
What is ODBC Driver and Data Source?
Open Database Connectivity (ODBC) is a standard application programming interface that allows external applications to access data from diverse database management systems. The ODBC interface provides for maximum interoperability – an application that is independent of any DBMS, can access data in various databases through a tool called an ODBC driver, which serves as an interface between an external program and an ODBC data source, i.e. a specific DBMS or cloud service.
The ODBC driver connection string is a parameterized string that consists of one or more name-value pairs separated by semi-colons. Parameters may include information about the data source name, server address and port, username and password, security protocols, SQL dialects, and many more. The required information is different depending on the specific driver and database. Here’s an example of ODBC connection string:
DRIVER={Devart ODBC Driver for Oracle};Direct=True;Host=127.0.0.1;SID=ORCL1020;User ID=John;Password=Doe
ODBC Drivers are powerful connectors for a host of database management systems and cloud services that allow you to connect to your data from virtually any third-party application or programming language that supports the ODBC API. By a third-party application, we mean tools like Power BI, Tableau, Microsoft Excel, etc.
Installing ODBC Driver for Windows 10
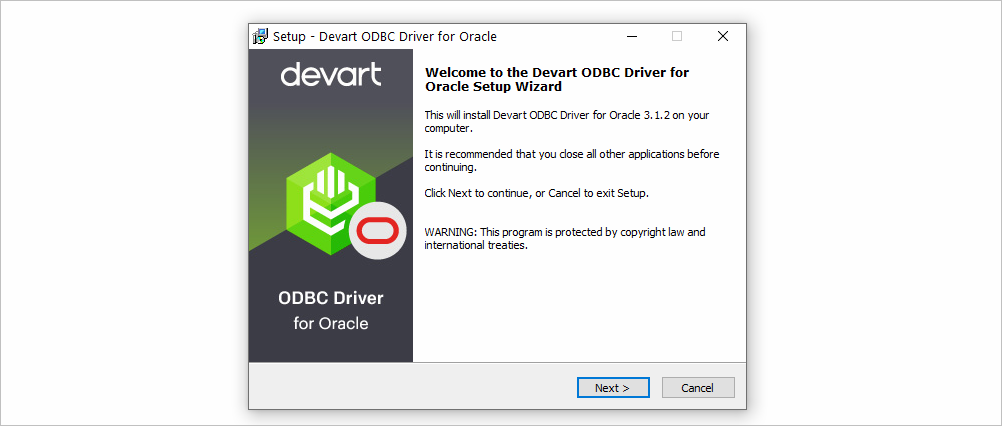
1. Run the downloaded installer file. If you already have another version of the driver installed in the system, you will get a warning — click Yes to overwrite the old files, though it’s recommended to first uninstall the old version. If this is the first time you install Devart ODBC driver, just click Next.
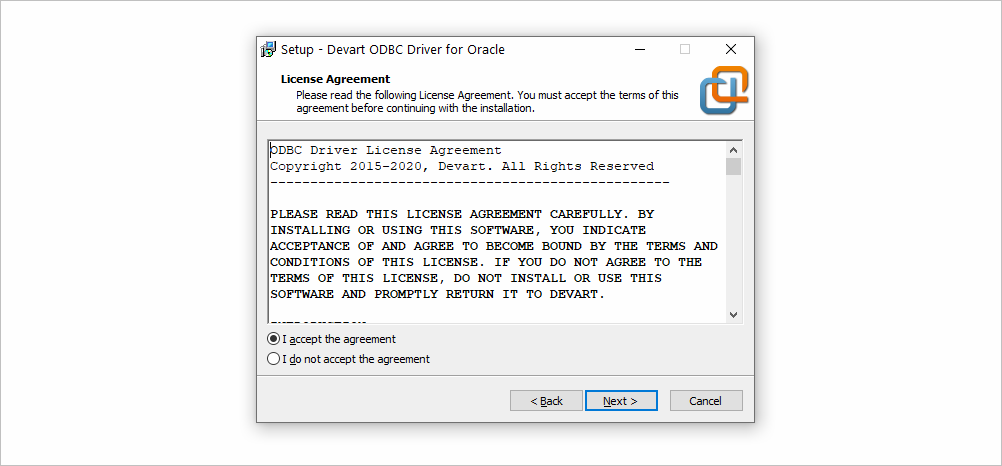
2. Read and accept the license agreement, then click Next.
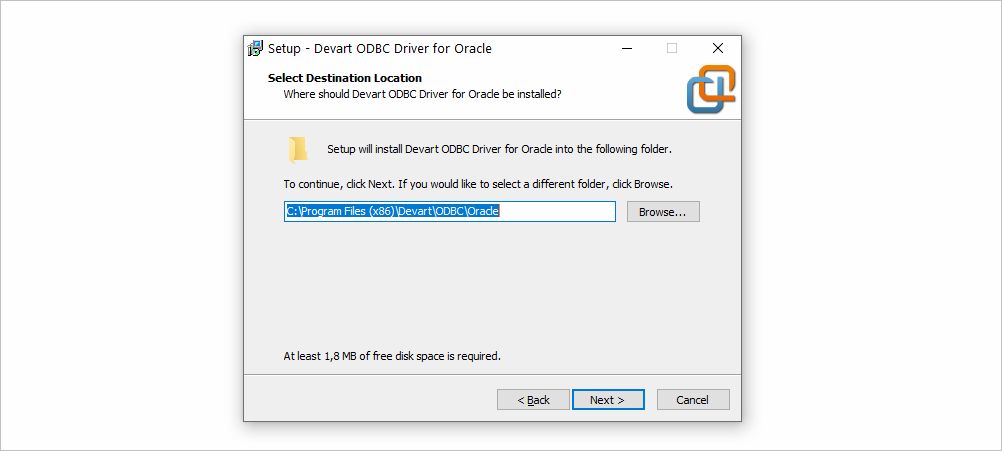
3. Select the installation directory for the ODBC driver and click Next.
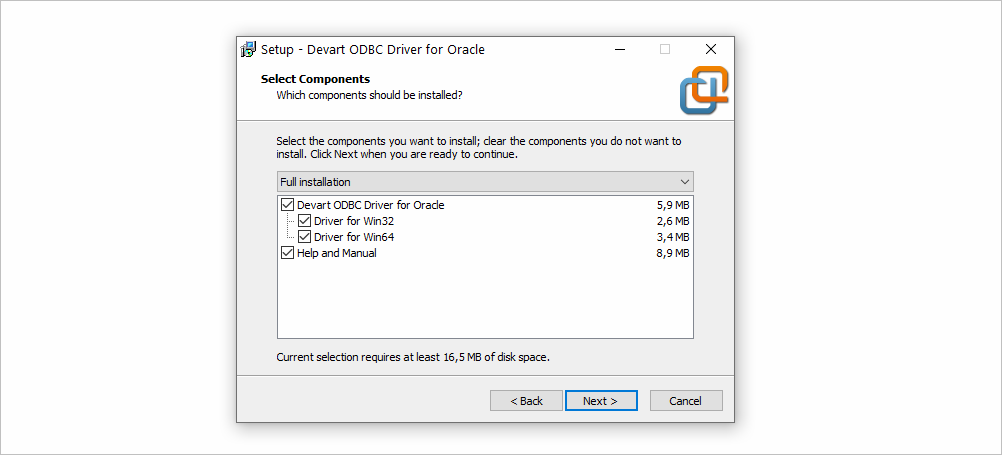
4. In the Select Components tab, select which version of the driver to install (64-bit / 32-bit), and whether to include the help files.
5. Confirm or change the Start Menu Folder and click Next.
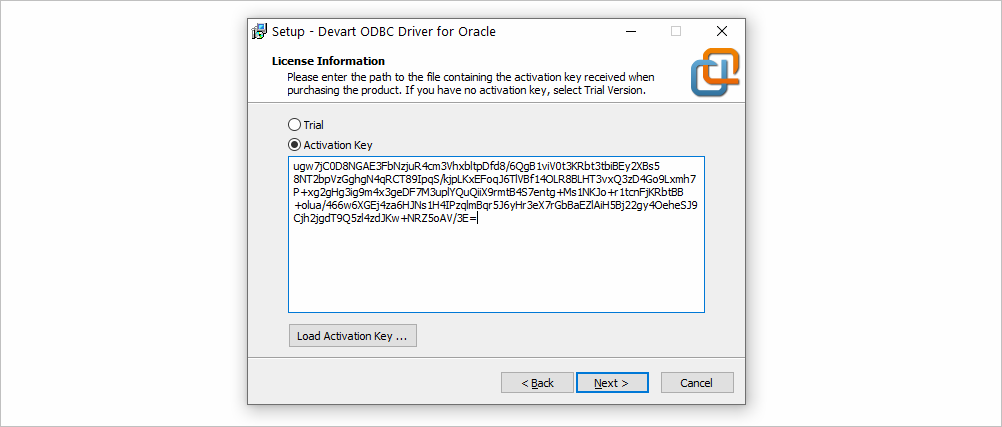
6. Input your activation key or choose Trial if you want to evaluate the product before getting a license. You can load the activation key by clicking on the Load Activation Key… button and selecting the license file from your machine. Click Next and then Install.
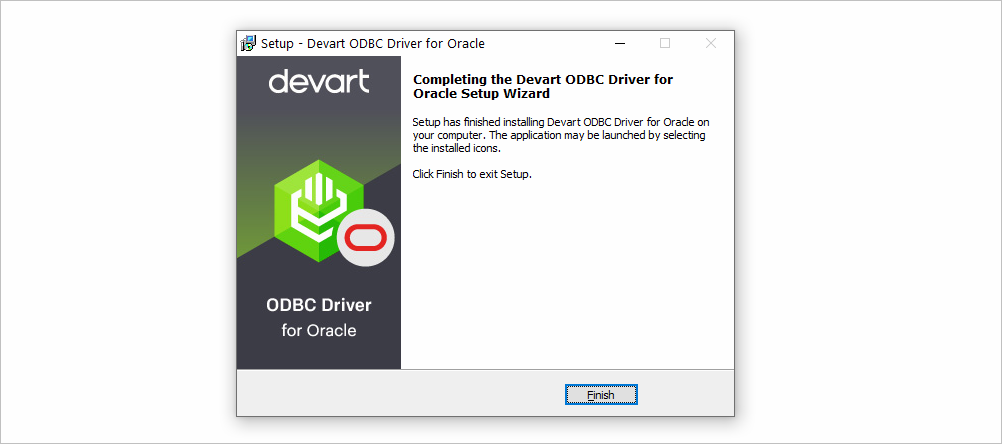
7. After the installation is completed, click Finish.
Configuring a DSN for ODBC Driver in Windows 10 (64-bit)
Before connecting a third-party application to a database or cloud source through ODBC, you need to set up a data source name (DSN) for the ODBC driver in the Data Source Administrator. A 64-bit version of the Microsoft Windows operating system includes both the 64-bit and 32-bit versions of the Open Database Connectivity (ODBC) Data Source Administrator tool (odbcad32.exe):
- The 32-bit version of odbcad32.exe is located in the C: \Windows\SysWoW64 folder.
- The 64-bit version of odbcad32.exe is located in the C: \Windows\System32 folder.
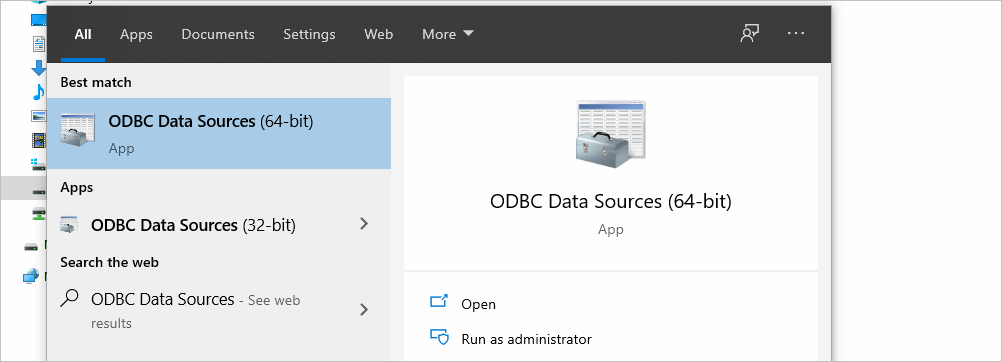
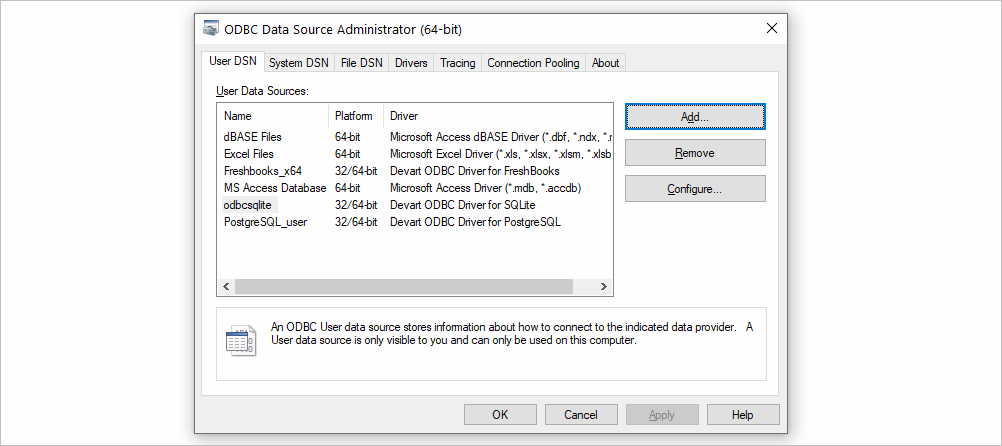
1. In your Windows Search bar, type ODBC Data Sources. The ODBC Data Sources (64 bit) and ODBC Data Sources (32 bit) apps should appear in the search results.
Alternatively, you can open the Run dialog box by pressing Windows+R, type odbcad32 and click OK.

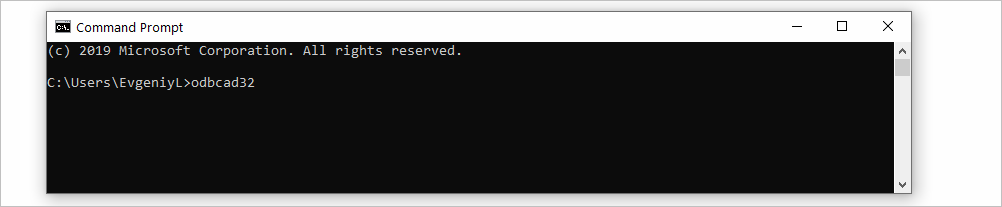
Yet another way to open the ODBC Data Source Administrator is via the command prompt: enter cmd in the search bar and click the resulting Command Prompt button. Enter the command odbcad32 and hit Enter.
2. Since most modern computer architectures are 64-bit, we’ll select the 64-bit version of the ODBC Data Source Administrator to create a DSN for our ODBC driver. The odbcad32.exe file displays two types of data source names: System DSNs and User DSNs. A User DSN is only accessible to the user who created it in the system. A System DSN is accessible to any user who is logged in into the system. If you don’t want other users on the workstation to access your data source using the DSN, choose a User DSN.
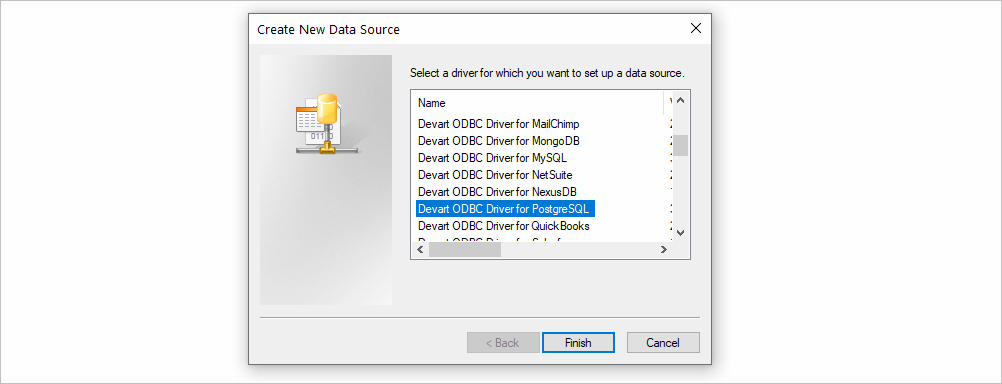
3. In the administrator utility, click on the Add button. The Create New Data Source dialog box will display the list of installed ODBC drivers in the system. Choose the needed driver from the list. The choice of the driver is determined by the data source you are trying to connect to — for example, to access a PostgreSQL database, choose Devart OBDC Driver for PostgreSQL. Click Finish.
4. Enter a name for your data source in the corresponding field. Fill in the parameters for the ODBC connection string, which is driver-specific. In most of our ODBC drivers for databases, a connection string with basic parameters requires the user to only input their server address, port number, and login credentials, since Devart ODBC drivers allow direct access to the database without involving additional client libraries.

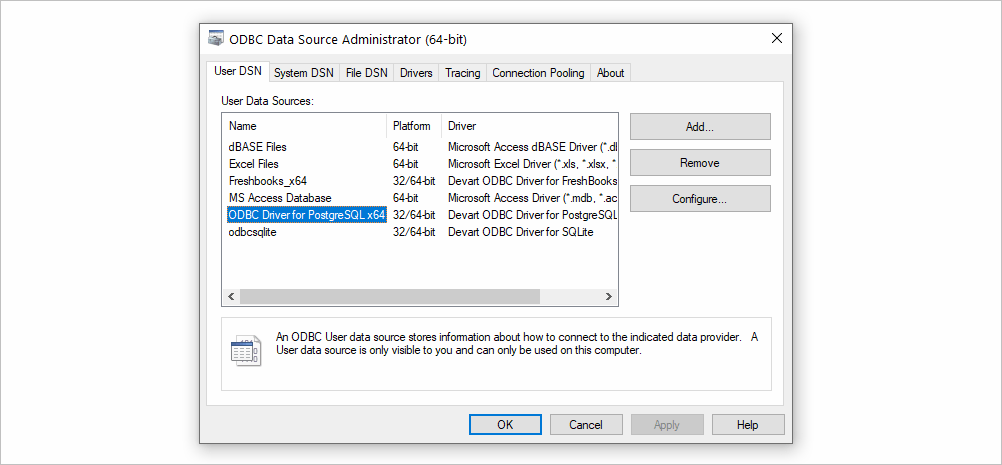
5. Click Test Connection to verify connectivity. If you see the Connection Successful message, click OK to save the DSN. You should now see your new DSN in the User DSN tab of the ODBC Data Source Administrator tool.
Configuring a DSN for ODBC Driver in Windows 10 (32-bit)
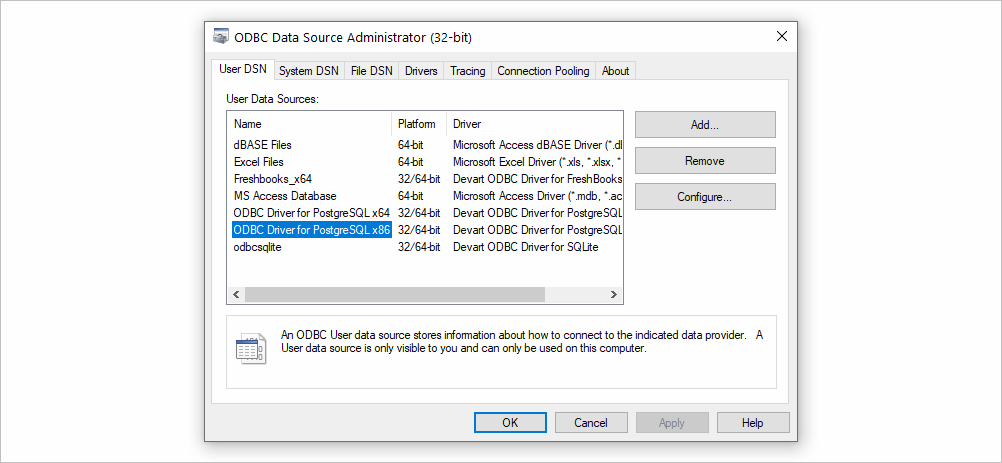
The steps for configuring an ODBC DSN for a 32-bit driver are practically the same as for the 64-bit driver, except for the step where you select the 32-bit version of the ODBC Data Source Administrator. Running the odbcad32 command in the Command Prompt or in the Run dialog box will start the 64-bit version of the ODBC administrator on the 64-bit Windows by default, therefore your best option is to select the 32-bit version of the administrator in the search results of the Windows search box.
Note though that if you have both versions (32-bit and 64-bit) of the driver installed and you have configured a User DSN (in contrast to a System DSN), you will be able to use the same DSN for 32-bit and 64-bit applications (see the Platform column in the screenshot below).
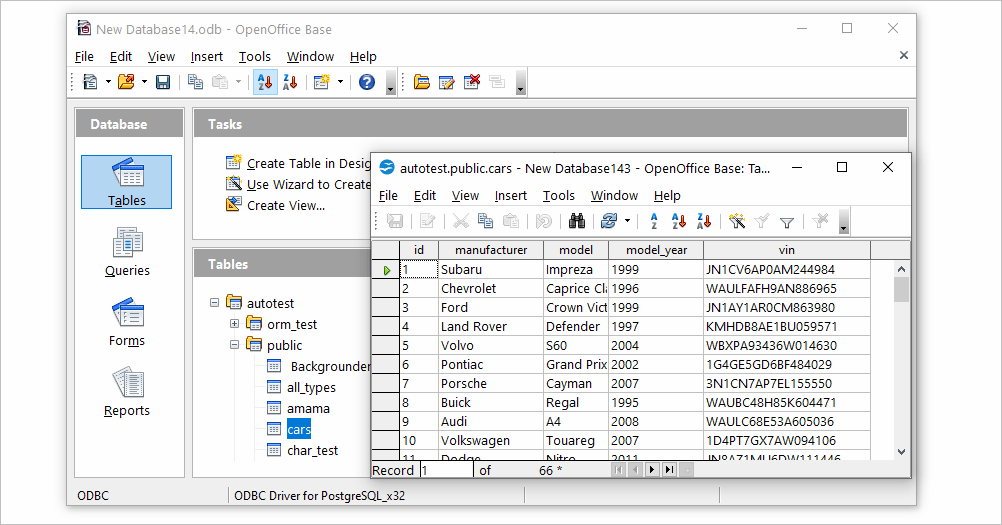
In a situation where you need to use an application that is available only in 32-bit, the 32-bit ODBC driver does the trick. An example is Apache OpenOffice, which is distributed as a 32-bit application.
Step-by-step ODBC Data Source Setup in Windows 10
- Press Windows + R to open the Run dialog.
- Type in odbcad32 and click OK.
- In the ODBC Data Source Administrator dialog box, select the System DSN or User DSN tab.
- Click Add. The Create New Data Source dialog box should appear.
- Locate the necessary driver in the list and click Finish.
- In the Data Source Name and Description fields, enter the name and a description for our ODBC data source, respectively.
- Fill in the driver-specific connection string parameters, such as server address, port, username, password, etc.
- Click Test Connection to verify connectivity.
- Click OK to save the DSN.

Open-Source GPT-3/4 LLM Alternatives to Try in 2024
Comparison of Open Source Web Crawlers for Data Mining and Web Scraping: Pros&Cons

Why is the Julia Programming Language Popular in 2024?

How to Become a Prompt Engineer in 2024
How the Digital Yuan Is Reshaping Consumer Banking Behaviors

Applob.com Download APK – Tweak your device Safe

About Apple Employee and Friends&Family Discount in 2024
How to Translate more 5,000 characters limit by Google

15 Web Developer Portfolios List ✯✯✯✯✯ in 2024
Open-Source GPT-3/4 LLM Alternatives to Try in 2024
-
 News21 hours ago
Open-Source GPT-3/4 LLM Alternatives to Try in 2024
-
 Crawling and Scraping21 hours ago
Comparison of Open Source Web Crawlers for Data Mining and Web Scraping: Pros&Cons
-
 Grow Your Business21 hours ago
How to Become a Prompt Engineer in 2024
-
 Software Development21 hours ago
Why is the Julia Programming Language Popular in 2024?
-
Business Imprint24 hours ago
How the Digital Yuan Is Reshaping Consumer Banking Behaviors
-
 Business Imprint24 hours ago
The Future of Finance: Investing in Bitcoin for Long-Term Wealth