Testing Tools
10 Ways to Fix Android Connected to WiFi But No Internet
It is a common problem for Android devices to not be able to connect to the internet. Not so often, now in the Era of LTE and 5G.
Even though your Android device is connected to the internet, it may prevent you from accessing certain features such as email and social media. We feel helpless if we don’t have internet access. The Internet is an integral part our lives. Even though we have a WiFi router, it is frustrating to not be able to connect. This is a common problem that can be easily fixed. We will show you how to fix this annoying problem in this article. There are several solutions that can be used to eliminate the annoying message “WiFi doesn’t have internet access”.
Fix Android Connected To WiFi But No Internet Access
Method 1 – Check if the Router has an Internet connection
This may sound absurd, but sometimes there is no internet. Your WiFi router is not connected to the internet. You can test if the problem is with your WiFi router by connecting to another device on the same network and seeing if you are able to access the internet. If you are unable to access the internet, it is likely that your router is responsible.
Method 2 – Turn off Mobile Data
Mobile data may cause interference to the Wi-Fi signal on certain occasions. This can prevent you from accessing the internet, even if you are connected to WiFi. Android will choose WiFi if there is an option for mobile data or WiFi. Some WiFi networks require that you log in to use them. You might find that the Android system does not recognize your connection as stable even after you log into.
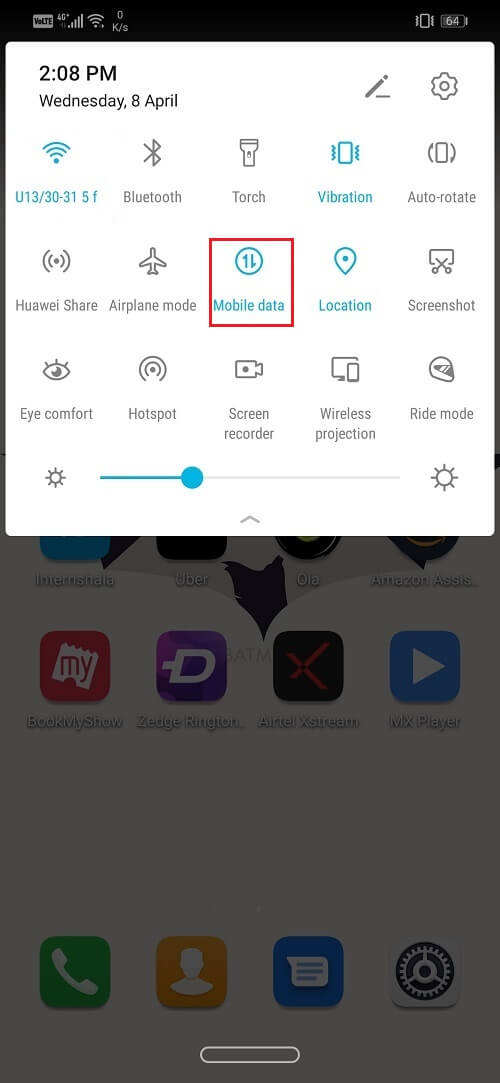
Method 2: Turn off Mobile Data
On certain occasions, mobile data can cause interference with the Wi-Fi signal. This prevents you from using the internet even after being connected to the WiFi. When the option of WiFi or mobile data is present, Android automatically chooses WiFi. However, some WiFi networks require you to log in before you can use them. It is possible that even after you log in the Android system is unable to recognize it as a stable internet connection.
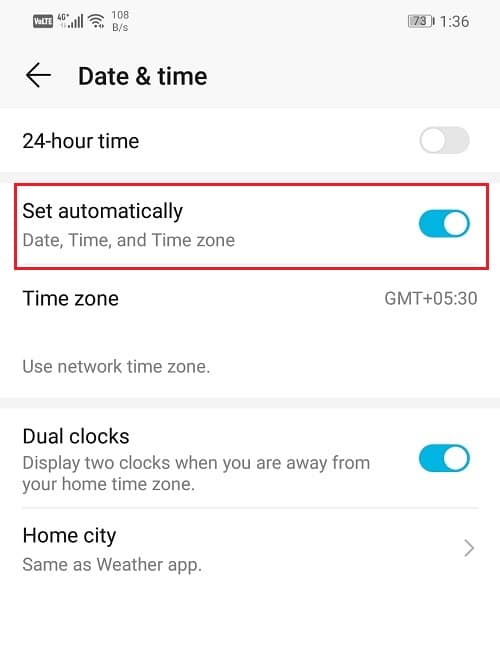
1. Go to settings.
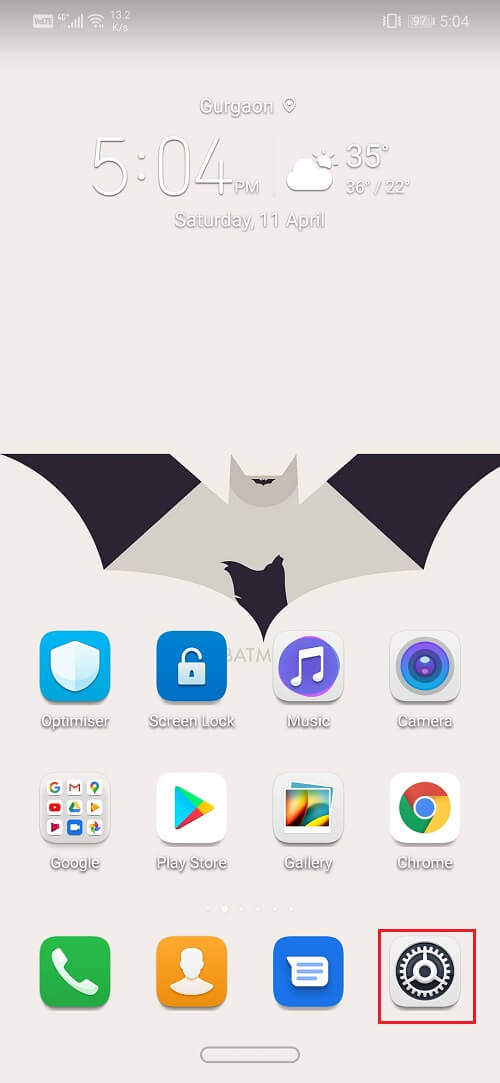
2. Click on the System tab.
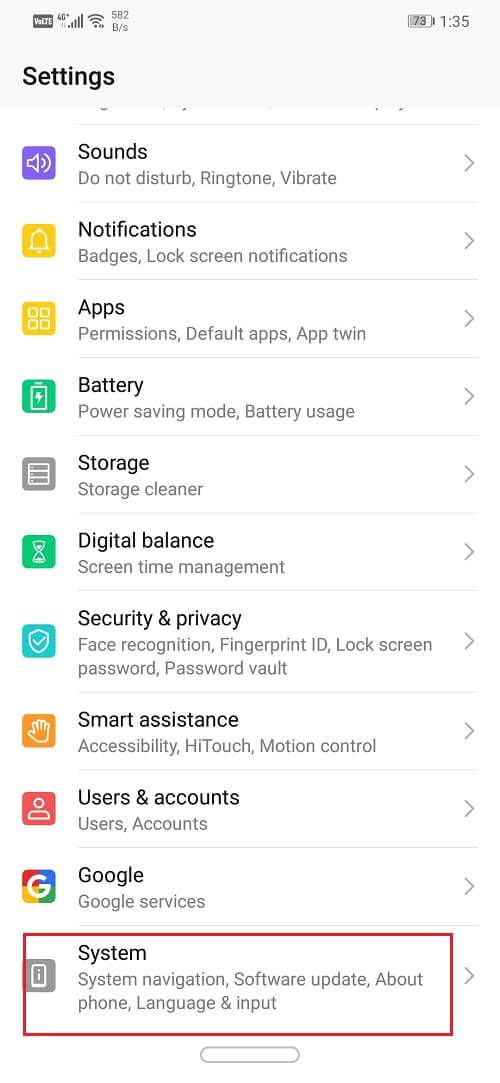
3. Now select the Date and Time option.
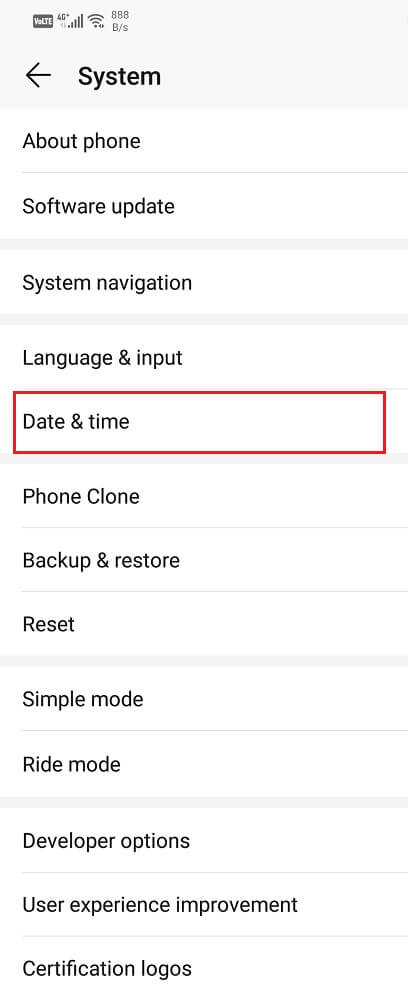
4. After that, simply toggle the switch on for automatic date and time settings.
Method 4: Forget WiFi and Connect Again
Another way to resolve this problem is to simply Forget WiFi and reconnect. This step would require you to re-enter the password for the WiFi, thus make sure that you have the correct password before clicking on the Forget WiFi option. This is an effective solution and often solves the problem. Forgetting and reconnecting to the network gives you a new IP route and this could actually fix the issue of no internet connectivity. To do this:
1. Drag down the drop-down menu from the notification panel on the top.
2. Now long-press the WiFi symbol to open to the list of WiFi networks.
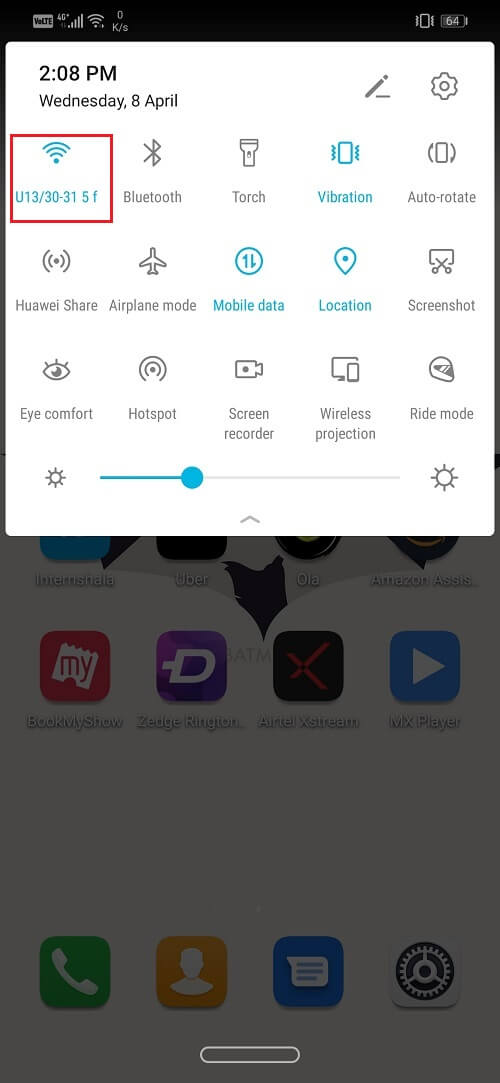
3. Now simply tap on the name of the Wi-Fi that you are connected to.
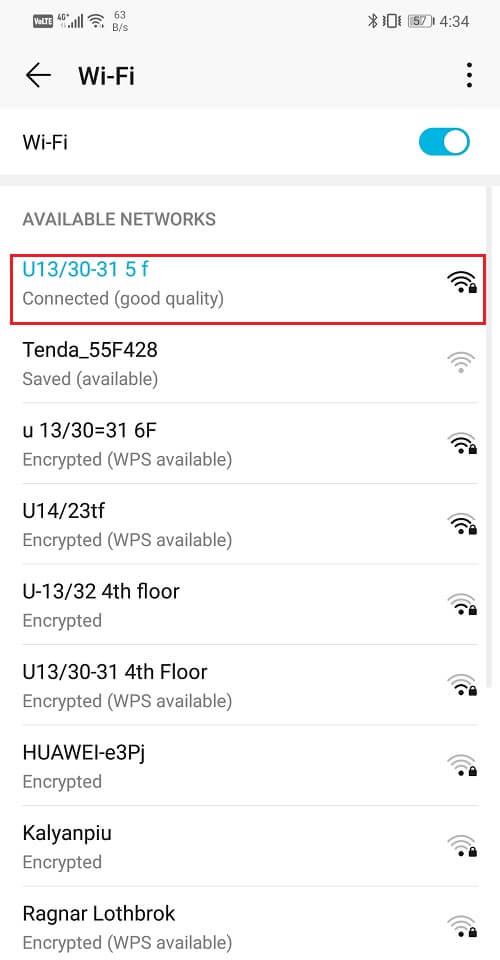
4. Click on the ‘Forget’ option.
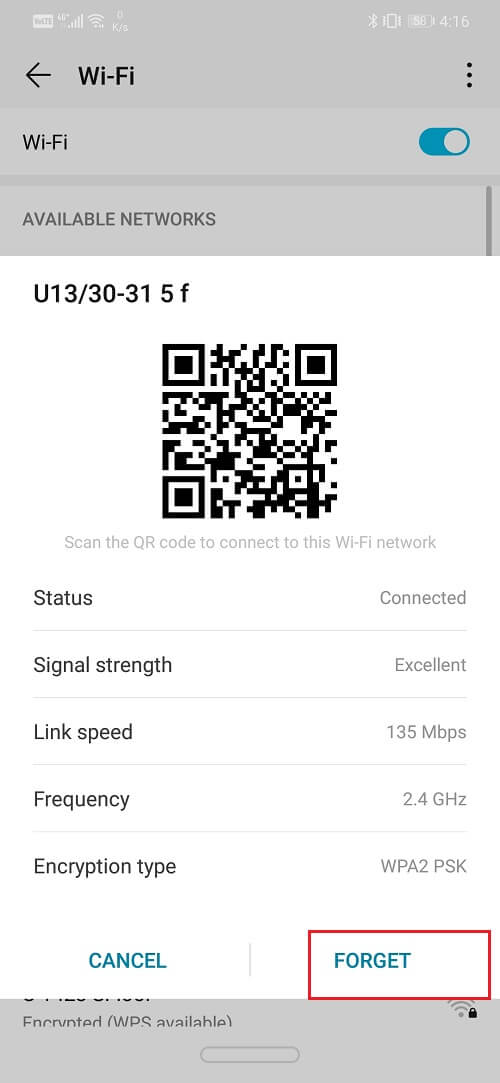
5. After that, simply tap on the same WiFi again and enter the password and click on connect.
And check if you’re able to fix Android Connected to WiFi but no Internet access issue. If not, then continue with the next method.
Method 5: Make sure that the Router is not blocking Traffic
There is a good chance that your router might be blocking your device from using the internet. It is preventing your phone from connecting to its network in order to access the internet. To make sure you need to visit the admin page of the router and check if your device’s MAC id is being blocked. Since every router has a different way of accessing its settings, it is better that you google your model and learn how to access the admin page.
1. Go to settings.
2. Click on the System tab.
3. Now select the Date and Time option.
4. After that, simply toggle the switch on for automatic date and time setting.
Method 4: Forget WiFi and Connect Again
Another way to resolve this problem is to simply Forget WiFi and reconnect. This step would require you to re-enter the password for the WiFi, thus make sure that you have the correct password before clicking on the Forget WiFi option. This is an effective solution and often solves the problem. Forgetting and reconnecting to the network gives you a new IP route and this could actually fix the issue of no internet connectivity. To do this:
1. Drag down the drop-down menu from the notification panel on the top.
2. Now long-press the WiFi symbol to open to the list of WiFi networks.
3. Now simply tap on the name of the Wi-Fi that you are connected to.
4. Click on the ‘Forget’ option.
5. After that, simply tap on the same WiFi again and enter the password and click on connect.
And check if you’re able to fix Android Connected to WiFi but no Internet access issue. If not, then continue with the next method.
Method 5: Make sure that the Router is not blocking Traffic
There is a good chance that your router might be blocking your device from using the internet. It is preventing your phone from connecting to its network in order to access the internet. To make sure you need to visit the admin page of the router and check if your device’s MAC id is being blocked. Since every router has a different way of accessing its settings, it is better that you google your model and learn how to access the admin page.
Method 7: Change Wireless Mode on Router
A WiFi router has different wireless modes. These modes correspond to the operating bandwidth. These are namely 802.11b or 802.11b/g or 802.11b/g/n. These different letters stand for different wireless standards. Now by default, the wireless mode is set to 802.11b/g/n. This works fine with most of the devices with the exception of some old devices. The wireless mode 802.11b/g/n is not compatible with these devices and might be the reason for the “No Internet Access” problem. In order to solve the problem simply:
1. Open the software for your Wi-Fi router.
2. Go to the Wireless settings and select the option for Wireless mode.
3. Now you will a drop-down menu, click on it, and from the list select 802.11b and then click on save.
4. Now restart the Wireless router and then try reconnecting your Android device.
5. If it still does not work you can also try changing the mode to 802.11g.
Method 8: Reboot Your Router
If the above methods fail to solve your problem then it is time for you to reboot your WiFi. You can do so by simply switching it off and then switching it on again. You can also do it via the admin page or software of your router if there is an option to reboot your WiFi.
Method 9: Update Your Router
I’ve just discovered reason / method 9: allow the router software to update.
Yesterday my mobile Wi-Fi started showing “No Internet access” in Android, while still working fine on my laptop. When I logged in to the router settings today, there was no sign of it blocking the phone, but on visiting the “Update” page I found the message “An update is available. This has already been downloaded and is ready to install.”
So I allowed it to install, and immediately had access again. I’m using the connection now, to send this.


How to Set Up Text-to-Speech for Channel Points on Twitch

The Average Size of Home Office: A Perfect Workspace
Top 10 Best Fake ID Websites [OnlyFake?]

How Much Does a Hosting Server Cost Per User for an App?
How Gaming Technologies are Transforming the Entertainment Industry

What is my Instagram URL? How to Find & Copy Address [Guide on Desktop or Mobile]

Applob.com Download APK – Tweak your device Safe

About Apple Employee and Friends&Family Discount in 2024
How to Translate more 5,000 characters limit by Google

How to Unlist your Phone Number from GetContact
-
 Cyber Risk Management4 days ago
How Much Does a Hosting Server Cost Per User for an App?
-

 Outsourcing Development4 days ago
All you need to know about Offshore Staff Augmentation
-

 Software Development4 days ago
Things to consider before starting a Retail Software Development
-
 Grow Your Business3 days ago
The Average Size of Home Office: A Perfect Workspace
-
Solution Review3 days ago
Top 10 Best Fake ID Websites [OnlyFake?]
-
Business Imprint4 days ago
How Gaming Technologies are Transforming the Entertainment Industry
-
 Gaming Technologies2 days ago
How to Set Up Text-to-Speech for Channel Points on Twitch